Using Multiple Datasource With Spring Boot
Table of Content
- Introduction
- Pre-requisite
- Architecture
- Bootstrap application using Spring Initializr
- Project Structure
- Setup MySQL Database using Docker
- Setup Postgres Database using Docker
- Configuring Datasources
- Using Datasource to Access Database
- Tips & Tricks
Introduction
This post demonstrates the use of multiple datasource in a Spring Boot application. By default, Spring Boot supports application properties (spring.datasource.*) for a single datasource. However, the behavior can be configured to support multiple datasources.
Pre-requisite
- Java 1.8 or above
- IntelliJ or Eclipse IDE
- Docker
- MySQL Workbench
- pgAdmin
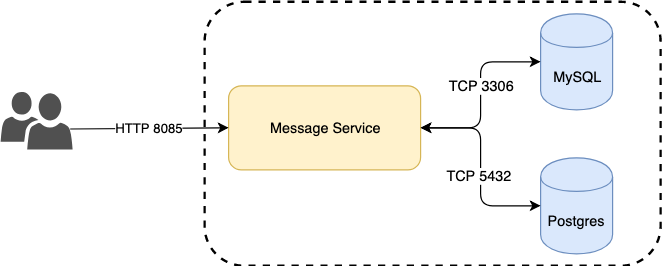
Architecture
Bootstrap application using Spring Initializr
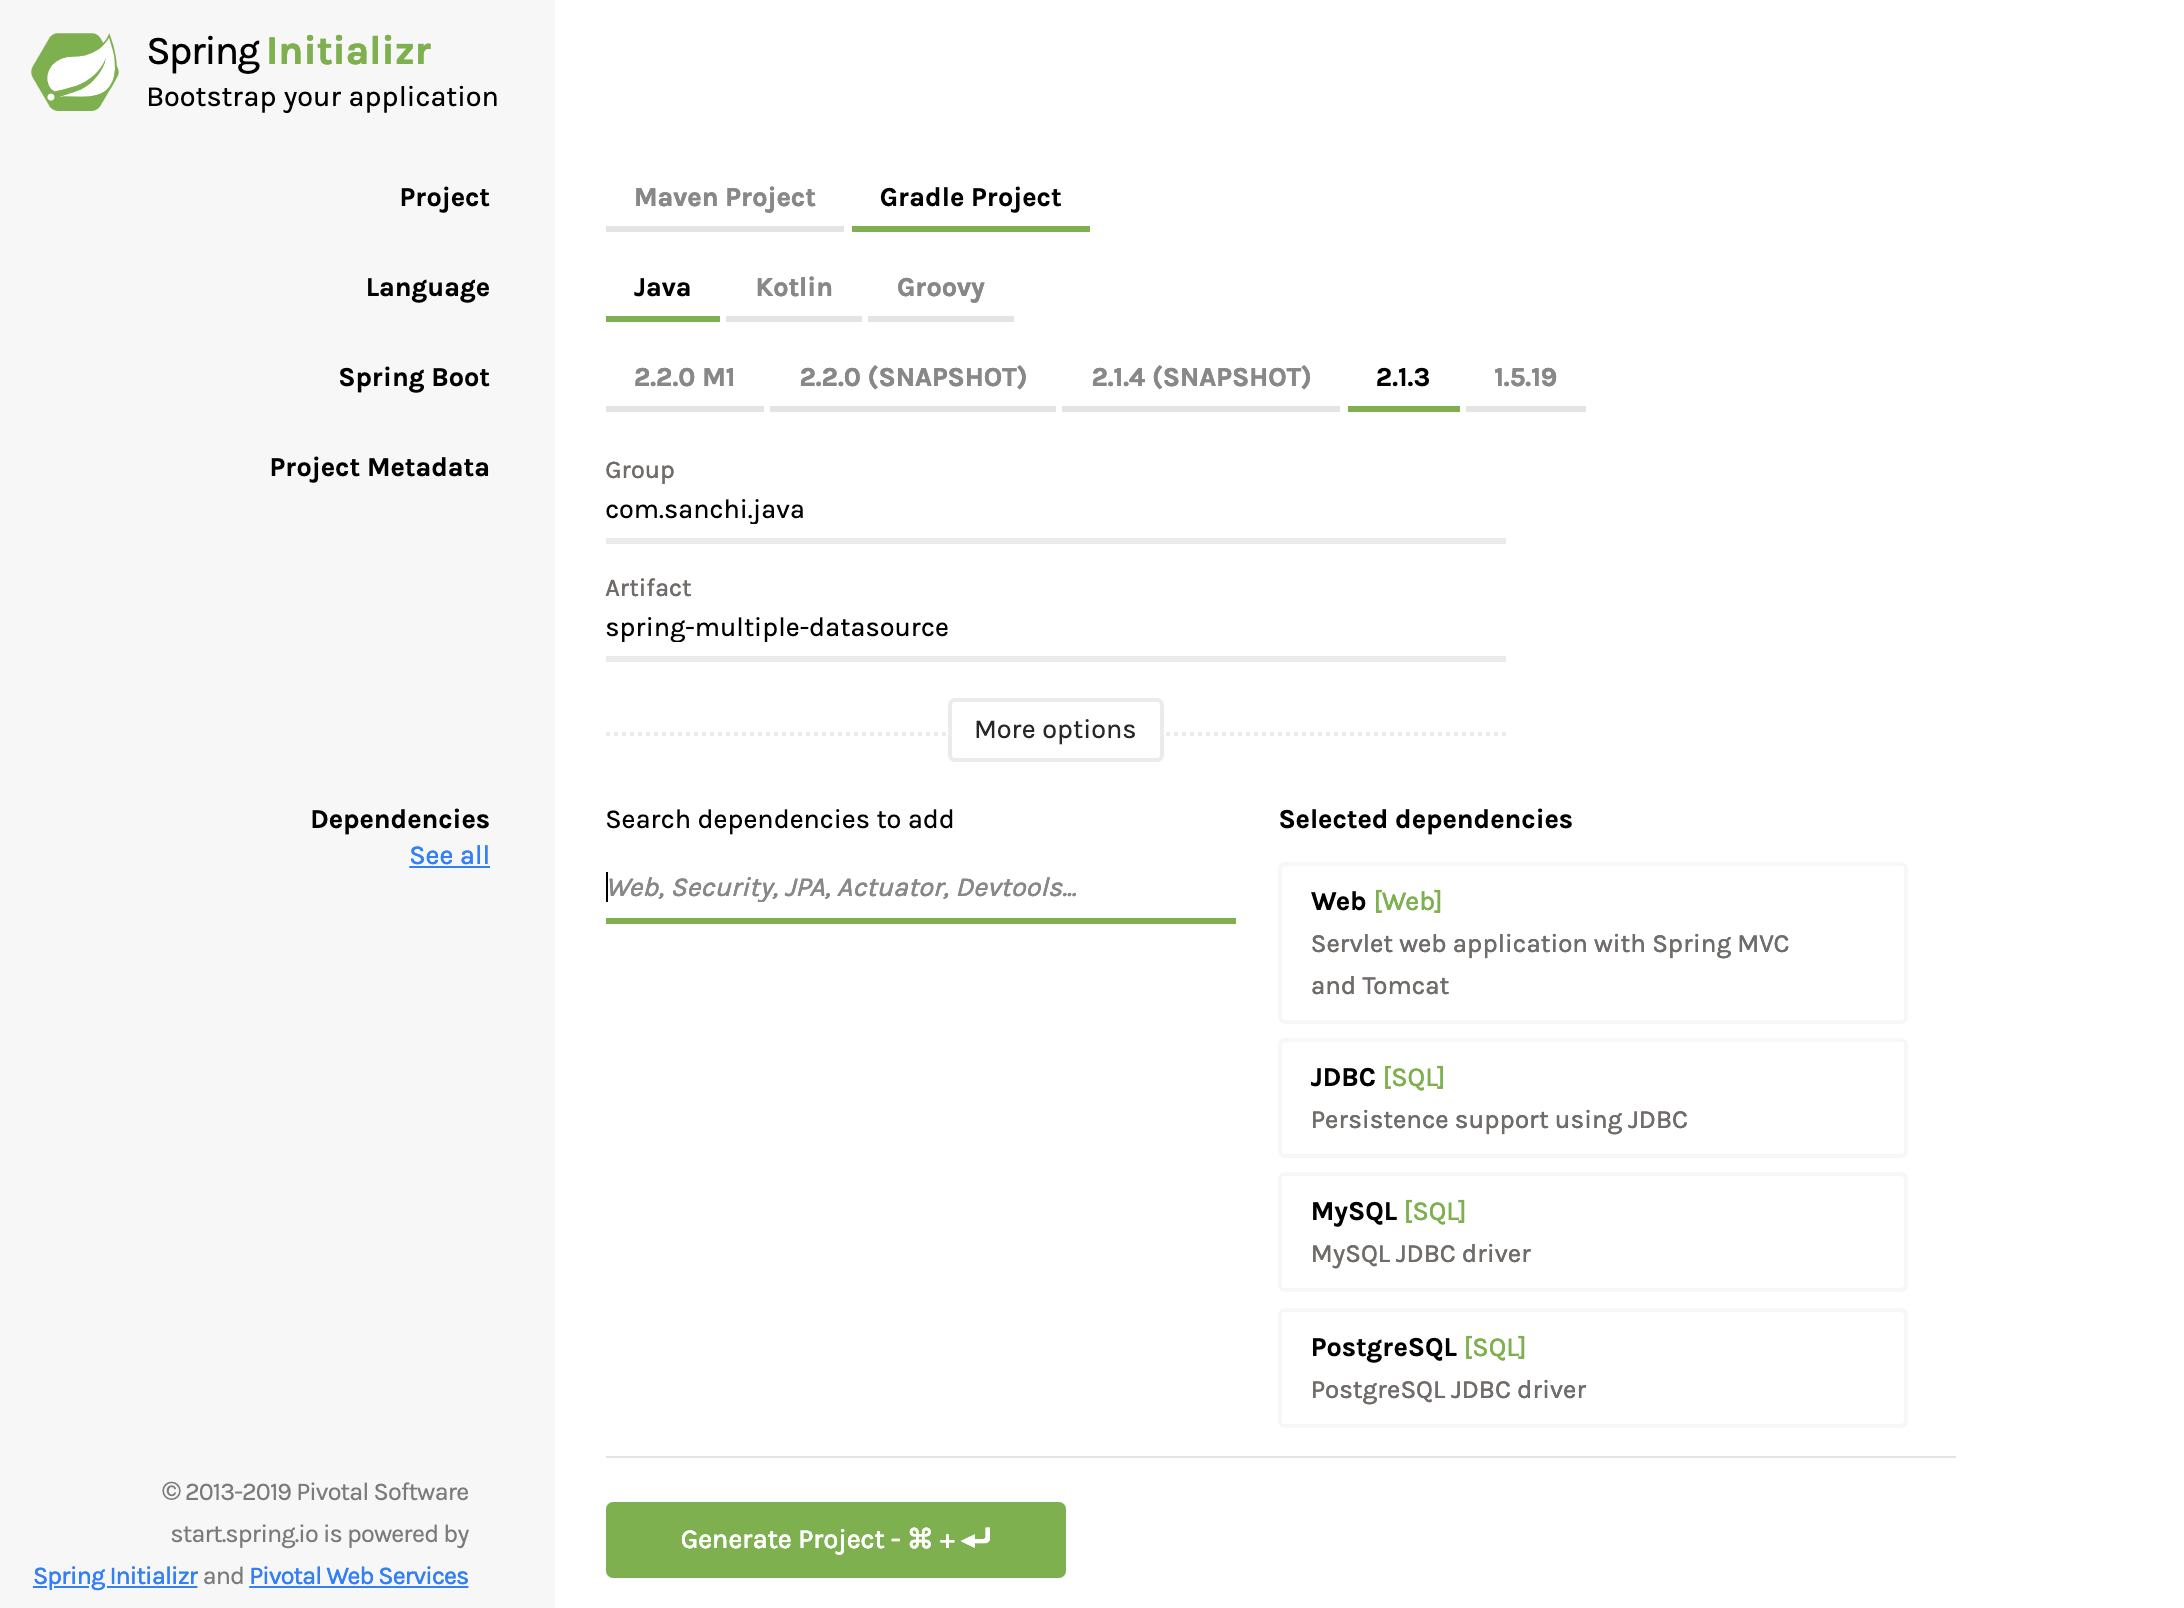
Let’s use Spring Initializr to bootstrap our application. Fill the form as shown below and click on Generate Project to download the project. Here I have included Web, JDBC, MySQL and PostgreSQL as dependencies.
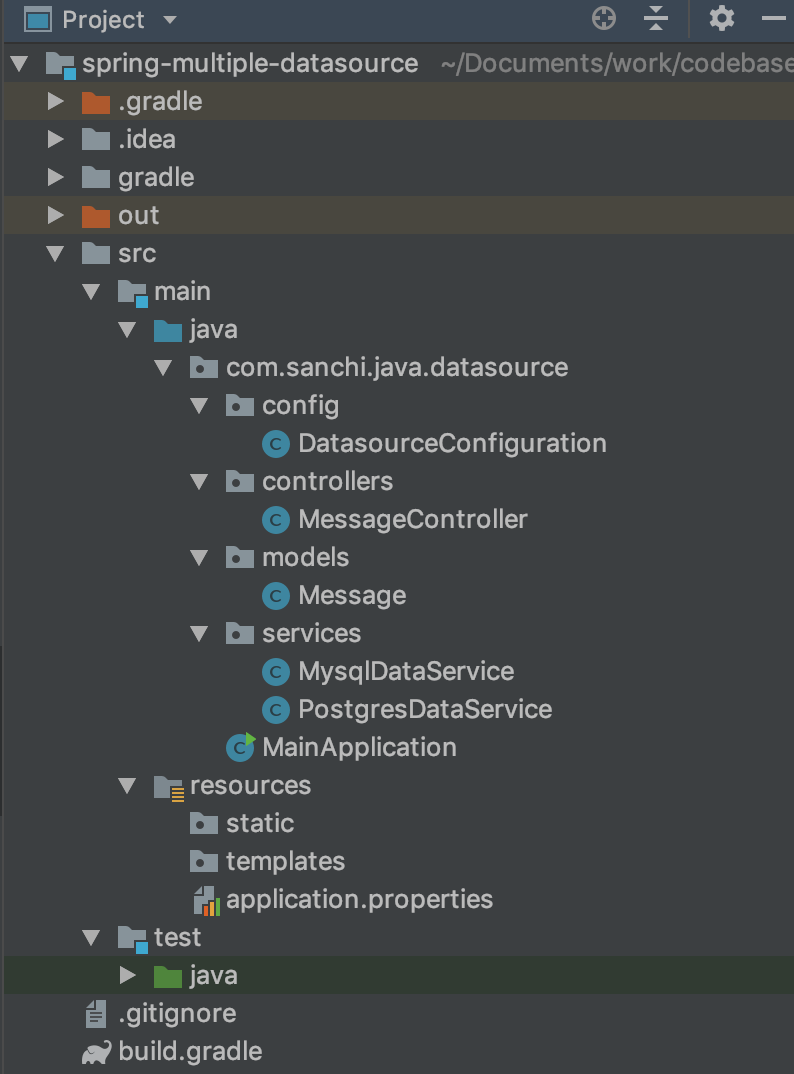
Project Structure
After download is complete, unzip and open the project in your favorite IDE. I am using IntelliJ in this post.
Setup MySQL Database using Docker
Downloading MySQL
You can download the MySQL docker image using docker pull command like below.
$ docker pull mysqlOnce the image is downloaded, you can verify using docker image ls | grep mysql
$ docker image ls | grep mysql
mysql                    latest              f991c20cb508        4 months ago        486MB
Running MySQL using Docker
Use following docker command to start MySQL server in the background.
$ docker run --name mysql -p 3306:3306 -e MYSQL_ROOT_PASSWORD=root -d mysqlAfter running the above command, docker will start the MySQL server inside a container. You can see the list of all the containers with the following command –
$ docker container ls
CONTAINER ID        IMAGE               COMMAND                  CREATED             STATUS              PORTS                                              NAMES
698aefdd4d7a        mysql:latest        "docker-entrypoint.s…"   3 months ago        Up 15 seconds       0.0.0.0:3306->3306/tcp, 0.0.0.0:32773->33060/tcp   mysql
Creating Table to Store Messages
Run below commands in MySQL Workbench to create a table that will be later used to store messages in the application.
CREATE SCHEMA test;
USE test;
CREATE TABLE message (
    message_id VARCHAR(100),
    text VARCHAR(100),
    datetime TIMESTAMP,
    PRIMARY KEY(message_id)
);
The above command creates a schema test and under that creates a table message to store our messages.
Setup Postgres Database using Docker
Downloading Postgres
You can download the Postgres docker image using docker pull command like below.
$ docker pull postgresOnce the image is downloaded, you can verify using docker image ls | grep postgres
$ docker image ls | grep postgres
postgres                 latest              30bf4f039abe        2 weeks ago         312MB
Running Postgres using Docker
Use following docker command to start Postgres server in the background.
$ docker run --name postgres -p 5432:5432 -e POSTGRES_PASSWORD=mysecretpassword -d postgresAfter running the above command, docker will start the Postgres server inside a container. You can see the list of all the containers with the following command –
$ docker container ls
CONTAINER ID        IMAGE               COMMAND                  CREATED             STATUS              PORTS                                              NAMES
ee7054fa00d4        postgres:latest     "docker-entrypoint.s…"   6 days ago          Up 10 seconds       0.0.0.0:5432->5432/tcp                             postgres
Creating Table to Store Messages
Run below commands in pgAdmin to create a table that will be later used to store messages in the application.
CREATE TABLE message (
    message_id VARCHAR(100),
    text VARCHAR(100),
    datetime TIMESTAMP,
    PRIMARY KEY(message_id)
);
The above command creates a table message under test database to store our messages. If you have noticed, the table structure in MySQL and Postgres are kept intentionally same.
Configuring Datasources
In order to configure datasources for both MySQL and Postgres databases, first you’ll have to add below properties to the application.properties.
postgresql.datasource.jdbc-url=jdbc:postgresql://localhost:5432/test?useSSL=false
postgresql.datasource.username=postgres
postgresql.datasource.password=mysecretpassword

mysql.datasource.jdbc-url=jdbc:mysql://localhost:3306/test?useSSL=false
mysql.datasource.username=root
mysql.datasource.password=root
Instead of using spring.datasource.* , you’ll need to use postgresql.datasource.* and mysql.datasource.* for Postgres and MySQL respectively. It is not mandatory to keep the prefix as above. You can have your own prefix, however maintain the same while writing the code.
Now let’s get to the cool part of configuring the datasources.
@Configuration
public class DatasourceConfiguration {

  @Bean(name = "mysqlDatasource")
  @ConfigurationProperties(prefix = "mysql.datasource")
  public DataSource mysqlDatasource() {
    return DataSourceBuilder.create().build();
  }

  @Bean(name = "postgresDatasource")
  @ConfigurationProperties(prefix = "postgresql.datasource")
  public DataSource postgresDatasource() {
    return DataSourceBuilder.create().build();
  }

  @Bean(name = "mysqlJdbcTemplate")
  public NamedParameterJdbcTemplate mysqlJdbcTemplate(
      @Qualifier("mysqlDatasource") DataSource dataSource) {
    return new NamedParameterJdbcTemplate(dataSource);
  }

  @Bean(name = "postgressJdbcTemplate")
  public NamedParameterJdbcTemplate postgresJdbcTemplate(
      @Qualifier("postgresDatasource") DataSource dataSource) {
    return new NamedParameterJdbcTemplate(dataSource);
  }
}- @Configuration indicates that a class declares one or more @Bean methods and may be processed by the Spring container to generate bean definitions and service requests for those beans at runtime.
- @Bean is used to create instances of Datasource with prefix postgresql.datasource and mysql.datasource. Spring is smart to understand this and obtain the respective property values from application.properties to configure the datasource.
- Later beans are created for NamedParameterJdbcTemplate using the datasources instance. Note, the use of @Qualifier here is to correctly inject the datasource beans to their respective JdbcTemplate.
Using Datasource to Access Database
Below class has two methods saveMessage and getMessage, which stores and retrieves message from database using NamedParameterJdbcTemplate. This is an example for Mysql connectivity, however the same can be cloned for Postgres connectivity as the table structures are same in both the databases.
@Service
public class MysqlDataService {

  @Autowired
  @Qualifier("mysqlJdbcTemplate")
  private NamedParameterJdbcTemplate jdbcTemplate;

  public int saveMessage(Message message) {
    final String query = "insert into message(message_id, text, datetime) "
        + "values (:messageId, :text, :datetime)";
    Map<String, Object> parameters = new HashMap<>();
    parameters.put("messageId", message.getMessageId());
    parameters.put("text", message.getText());
    parameters.put("datetime", message.getDateTime());
    return jdbcTemplate.update(query, parameters);

  }

  public Message getMessage(String messageId) {
    final String query = "select message_id, text, datetime from message "
        + "where message_id = :messageId";
    Map<String, Object> parameters = new HashMap<>();
    parameters.put("messageId", messageId);
    return jdbcTemplate.queryForObject(query, parameters,
        (rs, rowNum) -> new Message(rs.getString("message_id"),
            rs.getString("text"),
            rs.getTimestamp("datetime").toLocalDateTime()));
  }
}
Tips & Tricks
- While configuring datasource manually use
datasource.jdbc-urlinstead of conventionaldatasource.url. In Spring Boot 2.0 default JDBC connection pool has been changed from Tomcat to a faster and better HikariCP. However, in order to provide backward compatibility with application.properties, during default configuration spring copies the value in datasource.url to datasource.jdbc-url. - With Spring Boot 2.0 it is not required to provide the JDBC driver class name in application.properties. Just by having it in classpath spring is able to use it at runtime.
Source Code on Github