Spring Boot Url Shortener
Table of Content
- Introduction
- Pre-requisite
- Architecture
- Bootstrapping application using Spring Initializr
- Project Structure
- Additional Dependencies
- Setup Redis using Docker
- Configure Redis Template
- Creating Short URL
- Returning Original URL
- Running the application
- Testing using Postman
Introduction
This post demonstrates the use of Spring Boot 2.0 and Redis to build an URL shortener API popularly known as TinyURL. The application creates and stores a shorter version of original URL in Redis’s in-memory cache. It also provides an interface to obtain original URL in exchange of the shorter URL.
Pre-requisite
- Java 1.8 or above
- IntelliJ or Eclipse IDE
- Docker
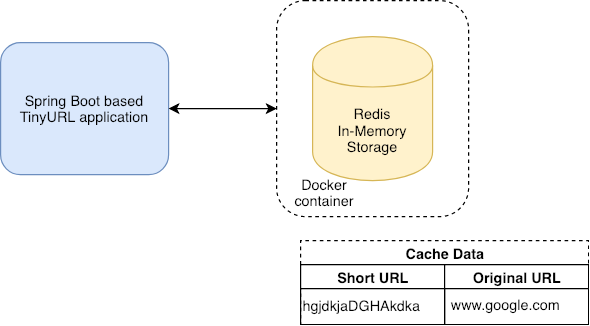
Architecture
Bootstrapping application using Spring Initializr
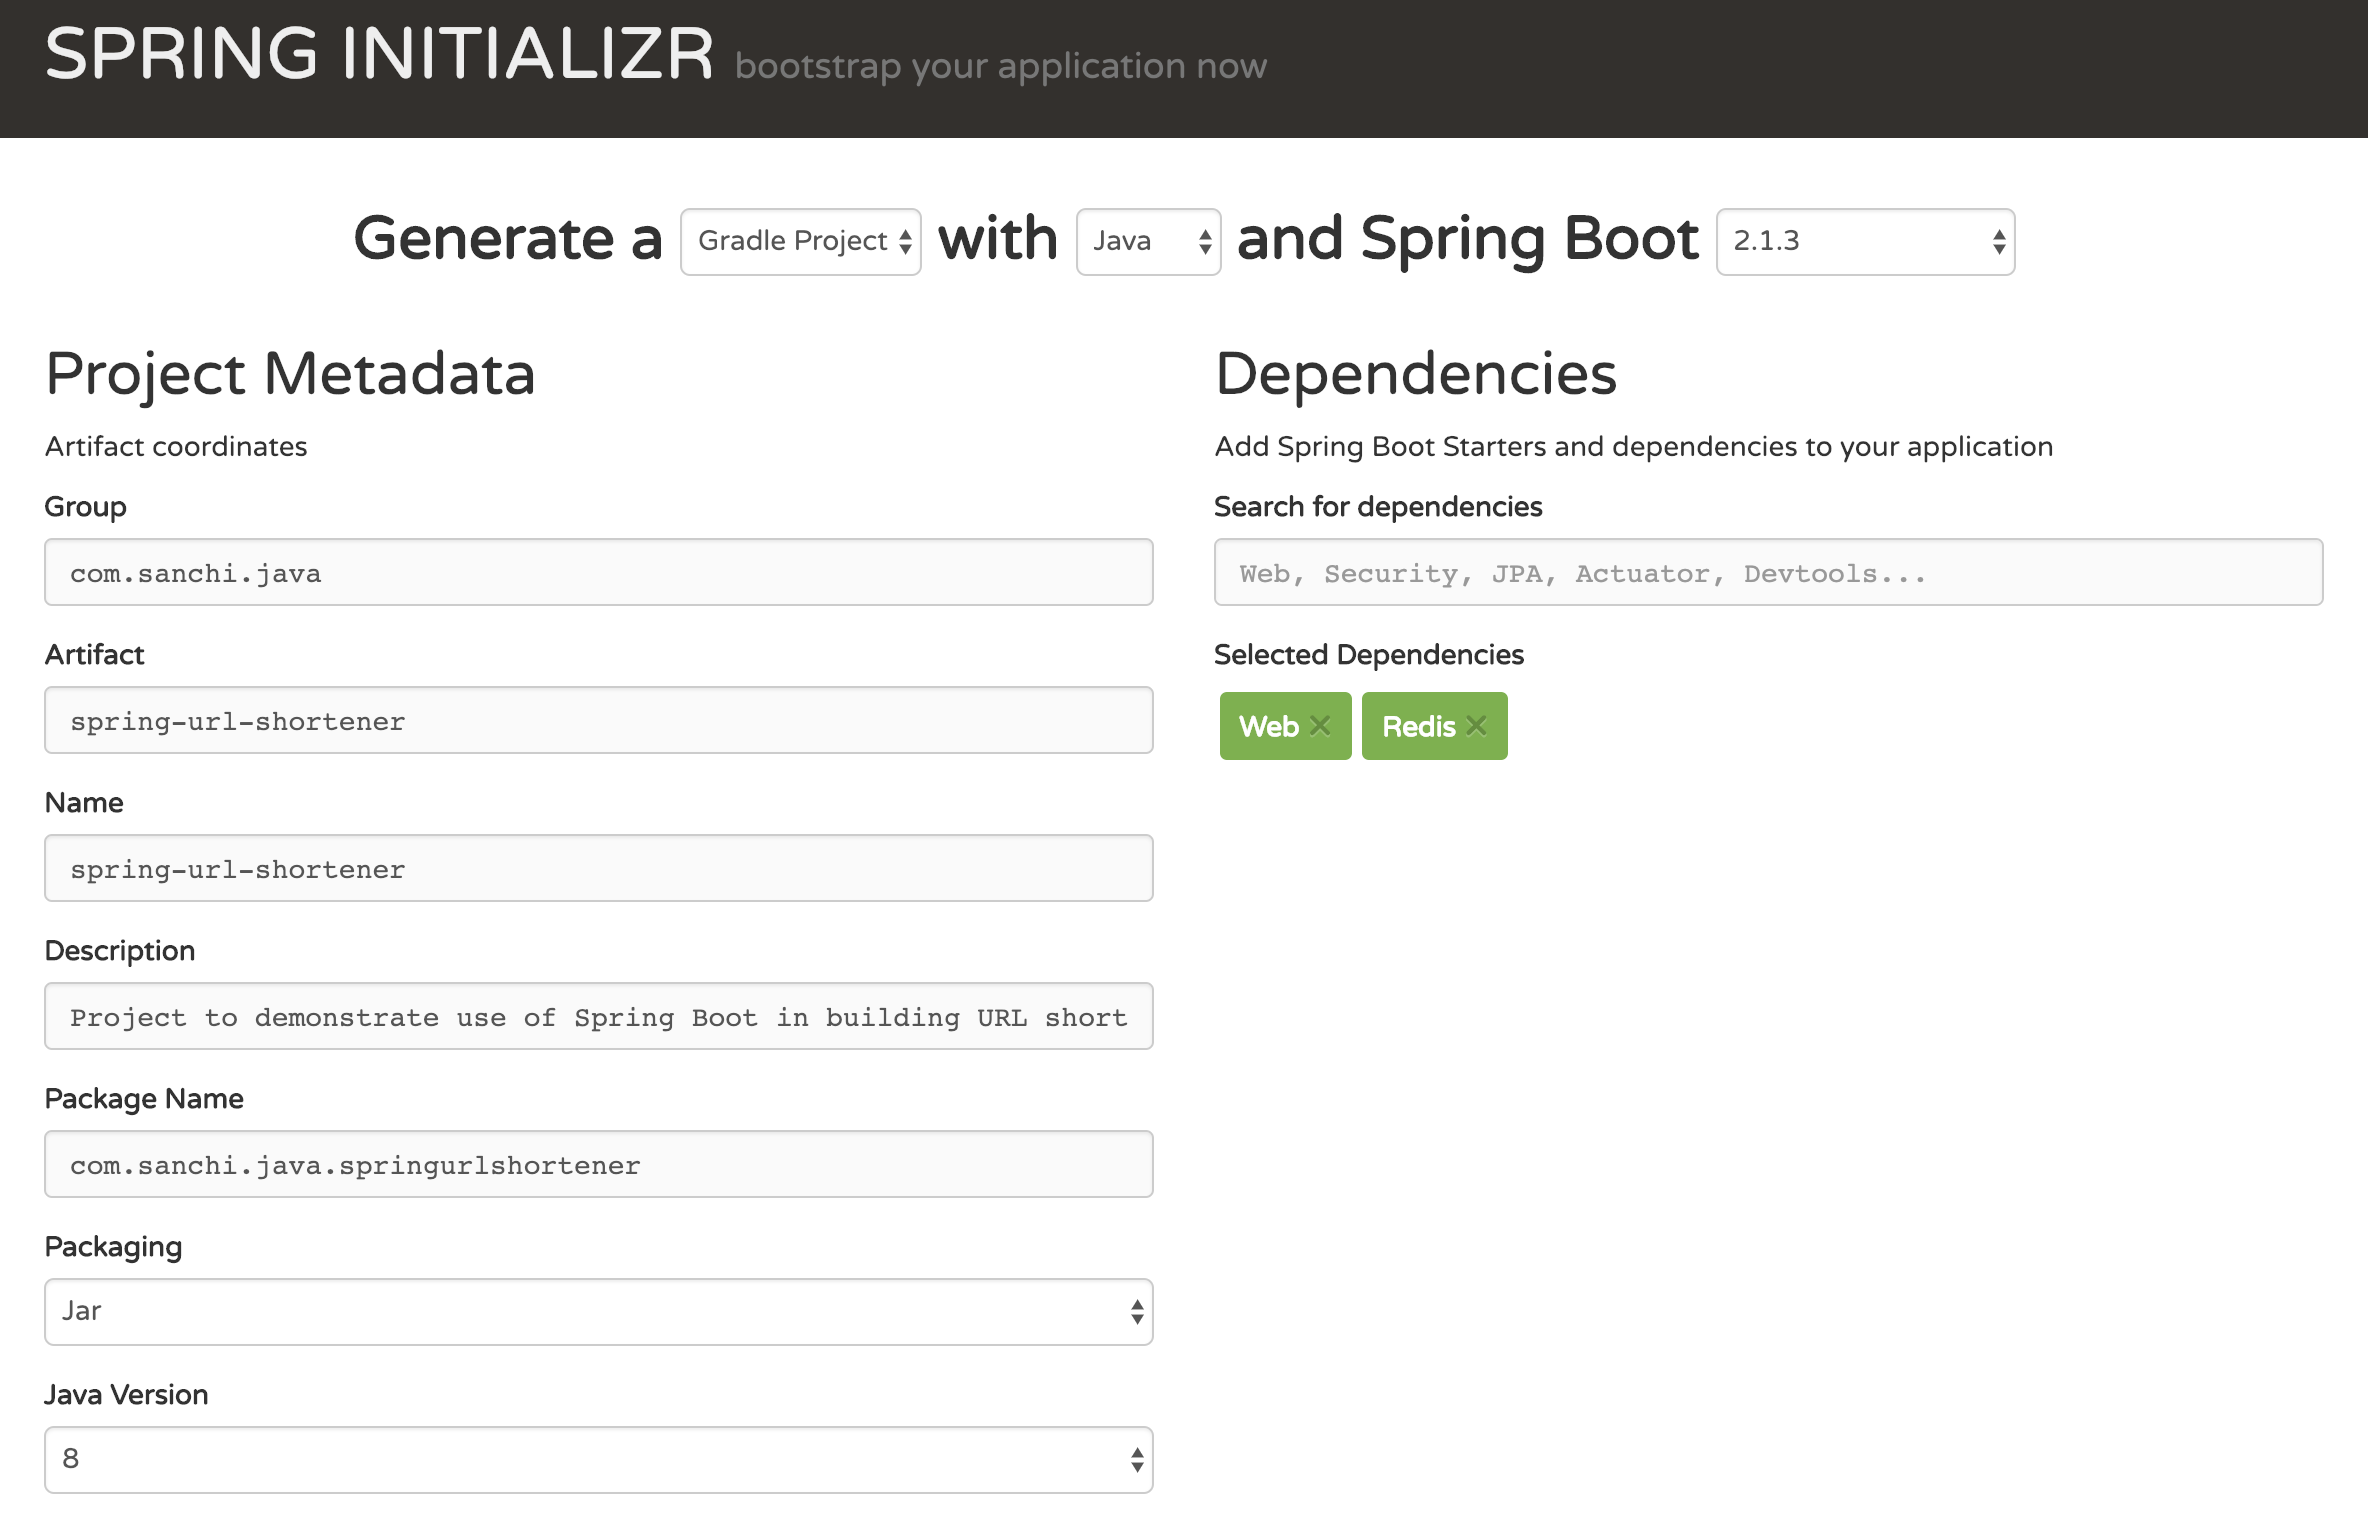
Let’s use Spring Initializr to bootstrap our application. Fill the form as shown below and click on Generate Project to download the project. Here I have included Spring MVC and Spring Data Redis as dependencies.
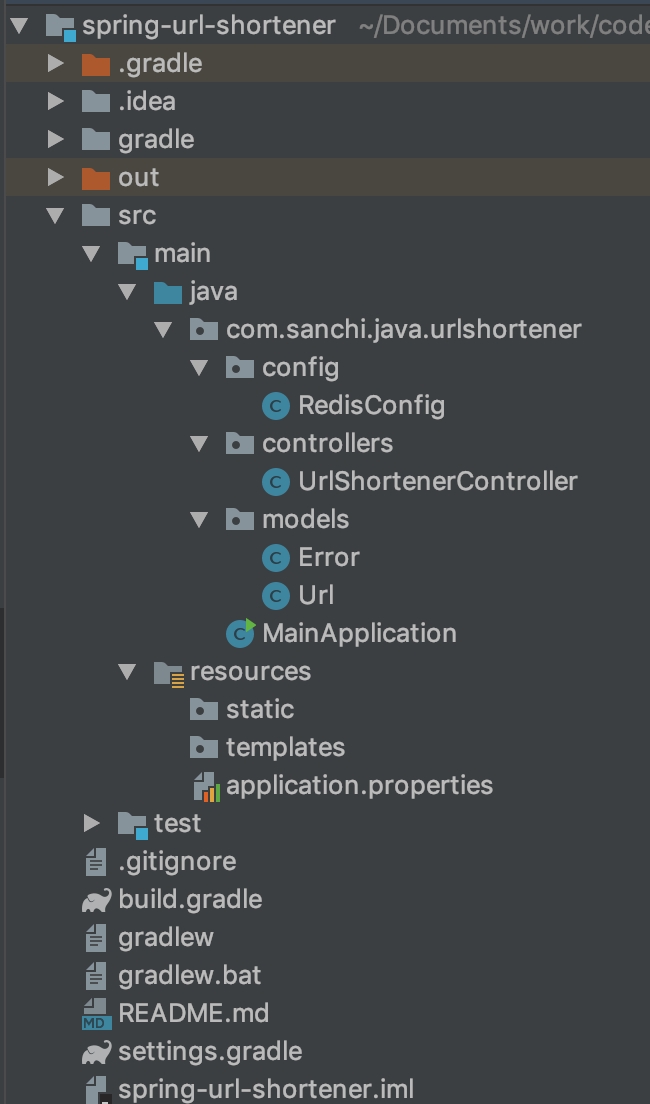
Project Structure
After download is complete, unzip and open the project in your favorite IDE. I am using IntelliJ in this post.
Additional Dependencies
In addition to the bootstraped dependencies, you will also need the following.
compile('commons-validator:commons-validator:1.4.0')
compile('com.google.guava:guava:23.0-rc1')
Add them to your project’s build.gradle.
- common-validator library will be used to validate the input/original URL
- Google’s guava library will be used to generate a Murmur3 based unique hash key for original URL. This key will be treated as the shorter URL.
Setup Redis using Docker
Downloading Redis
You can download the Redis docker image using docker pull command like below.
$ docker pull redisOnce the image is downloaded, you can verify using docker image ls | grep redis
$ docker image ls | grep redis
redis                   latest              1babb1dde7e1        4 months ago        94.9MB
Running Redis using Docker
Finally, let us run Redis using Docker. Use the following command to start a Redis server in the background.
$ docker run -d --name=redis -p 6379:6379 redisAfter running the above command, docker will start the Redis server inside a container. You can see the list of all the containers with the following command –
$ docker container ls
CONTAINER ID        IMAGE               COMMAND                  CREATED             STATUS              PORTS                    NAMES
a9b4f0ab78cf        redis:latest        "docker-entrypoint.s…"   2 months ago        Up 2 minutes        0.0.0.0:6379->6379/tcp   redis
Accessing Redis using Redis CLI
In order to access Redis server and read content, we will be using Redis CLI as a client. There are other clients available that you can be used too. However, I found this to be the simplest and the lightest client available out of all. To install Redis CLI via Homebrew use the below command.
$ brew install redisTo check the version of installed Redis CLI you can use the below command.
$ redis-cli --version
redis-cli 5.0.3
To verify, if the Redis CLI is able to connect to Redis server on Docker container, use the following command. Response as PONG means the connection is successful.
$ redis-cli ping
PONG
To enter into the interactive mode and run Redis commands, do the following.
$ redis-cli
127.0.0.1:6379>
Configure Redis Template
By default the auto configured RedisTemplate provided by Sprint Boot works well with a String based Key/Value pair. However, in this post we will store Key as a String and Value as a JSON object.
{
    "id": "5446d139",
    "url": "https://www.codeprimers.com/spring-boot-url-shortener",
    "created": "2019-02-18T13:29:14.449"
}
In order to do so, we need to configure our own version of RedisTemplate as shown below.
@Configuration
public class RedisConfig {

  @Autowired
  ObjectMapper mapper;

  @Autowired
  RedisConnectionFactory connectionFactory;

  @Bean
  RedisTemplate<String, Url> redisTemplate() {
    final RedisTemplate<String, Url> redisTemplate = new RedisTemplate<>();
    Jackson2JsonRedisSerializer valueSerializer = new Jackson2JsonRedisSerializer(Url.class);
    valueSerializer.setObjectMapper(mapper);
    redisTemplate.setConnectionFactory(connectionFactory);
    redisTemplate.setKeySerializer(new StringRedisSerializer()); [1]
    redisTemplate.setValueSerializer(valueSerializer); [2]
    return redisTemplate;
  }
}- Setting StringRedisSerializer as key serializer
- Setting Jackson2JsonRedisSerializer with URL.class as value serializer
Creating Short URL
Now, let’s create a controller method that can be used to create a short URL.
@RestController
@RequestMapping(value = "/rest/url")
public class UrlShortenerController {

  @Autowired
  private RedisTemplate<String, Url> redisTemplate;

  @Value("${redis.ttl}")
  private long ttl;

  /**
   * Returns a short URL.
   */
  @RequestMapping(method = RequestMethod.POST)
  @ResponseBody
  public ResponseEntity postUrl(@RequestBody @NotNull Url url) {

    // using common's validator to validate the URL. [1]
    UrlValidator validator = new UrlValidator(
        new String[]{"http", "https"}
    );

    // if invalid url, return error [2]
    if (!validator.isValid(url.getUrl())) {
      Error error = new Error("url", url.getUrl(), "Invalid URL");
      return ResponseEntity.badRequest().body(error);
    }

    // generating murmur3 based hash key as short URL. [3]
    String id = Hashing.murmur3_32().hashString(url.getUrl(), Charset.defaultCharset()).toString();
    url.setId(id);
    url.setCreated(LocalDateTime.now());

    //store in redis [4]
    redisTemplate.opsForValue().set(url.getId(), url, ttl, TimeUnit.SECONDS);

    return ResponseEntity.ok(url);
  }
}
This is a simple Spring Boot RestController with a request mapping for /rest/url. Let me elaborate different steps involved in writing this method.
- Use commons-validator library to validate the input URL. Here I am checking if its a http or https.
- If the URL is found to be invalid, return HTTP 400 bad request.
- If the URL is valid, generate a hash key using guava’s murmur3 hashing algorithm.
- Store both hash key and original URL in Redis. Also, assign a Time to Live (TTL) while storing in Redis.
Note: Time to Live(TTL) defines the lifetime of an entry in Redis cache. Its a good practice to make it configurable for your application.
Returning Original URL
Now that we have created a method to create shorter URL. Let’s also create a method to obtain the original URL in exchange of the shorter URL.
@RestController
@RequestMapping(value = "/rest/url")
public class UrlShortenerController {

  @Autowired
  private RedisTemplate<String, Url> redisTemplate;

  /**
   * Returns the original URL.
   */
  @RequestMapping(value = "/{id}", method = RequestMethod.GET)
  @ResponseBody
  public ResponseEntity getUrl(@PathVariable String id) {

    // get from redis
    Url url = redisTemplate.opsForValue().get(id);

    if (url == null) {
      Error error = new Error("id", id, "No such key exists");
      return ResponseEntity.status(HttpStatus.NOT_FOUND).body(error);
    }

    return ResponseEntity.ok(url);
  }
}
Again, this is a simple GET method to return original URL stored in Redis cache in exchange of shorter URL or hash key.
Running the application
One of the biggest advantages of packaging your application as a jar and using an embedded HTTP server is that you can run your application as your would any other. The Spring Boot Gradle plugin also includes a bootRun task that can be used to run your application in an exploded form. The bootRun task is added whenever you apply org.springframework.boot and java plugins.
$ ./gradlew bootRunIn case you have configured your project with maven, you can use the below command to start the application.
$ mvn spring-boot:runTesting using Postman
Now let’s get to the part where we will validate above code. I’ll be using Postman as a HTTP client to test the application. However, you can decide to use any other client that you are comfortable with. Also you can find JSON file of my Postman project in the same Github repository under the path `/src/test/resources/postman.
Creating Short URL
Request
HTTP POST -> http://localhost:8085/rest/urlRequest Body
{
    "url": "https://www.codeprimers.com/spring-boot-url-shortener"
}
Response Body
{
    "id": "5446d139",
    "url": "https://www.codeprimers.com/spring-boot-url-shortener",
    "created": "2019-02-18T13:29:14.449"
}
Returning Original URL
Request
HTTP GET -> http://localhost:8085/rest/url/5446d139Response Body
{
    "id": "5446d139",
    "url": "https://www.codeprimers.com/spring-boot-url-shortener",
    "created": "2019-02-18T13:29:14.449"
}
You can also verify the content using Redis CLI as below.
127.0.0.1:6379> get 5446d139
"{\"id\":\"5446d139\",\"url\":\"https://www.codeprimers.com/spring-boot-url-shortener\",\"created\":\"2019-02-18T13:29:14.449\"}"
Source Code on Github