Building REST Service using Spring Boot
Table of Content
- Introduction
- Pre-requisite
- UML Diagram
- Using Appropriate HTTP methods
- Bootstrapping REST service using Spring Initialzr
- Project Structure
- Creating Request Mappings
- Running the application
- Testing using Postman
Introduction
This article provides a step-by-step guide for building REST web services using Spring Framework. In order to explain it better, I have used an example of library application which includes resources like departments and books. You will also find a link to complete source code in the end of this article.
Pre-requisite
- Java 1.8 or newer
- IntelliJ or Eclipse IDE
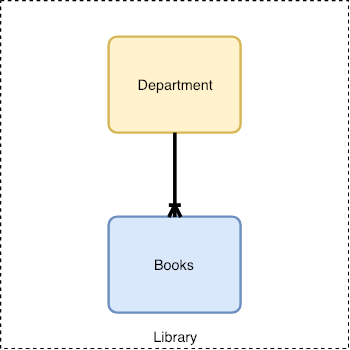
UML Diagram
The below diagram describes different resources involved in this problem statement and their relationship with each other. In this article, I will focus on building CRUD operations for ‘Department’ resource. In the next article, we shall look at building similar operations for second level or sub-level resource ‘Book’.
Using Appropriate HTTP methods
Even though there are no rules for selecting a HTTP method for an operation in REST web service, it is important to follow the best practices to keep your service consistent with the industry standards. Otherwise you service won’t be accepted by a larger client base as it will be difficult and confusing to incorporate it in their code. Below are some standards (not rules) that can be used.
| Operation | HTTP Method |
|---|---|
| Retrieve/Read | GET |
| Create | POST |
| Update | PUT |
| Delete | DELETE |
| Partial Update | PATCH |
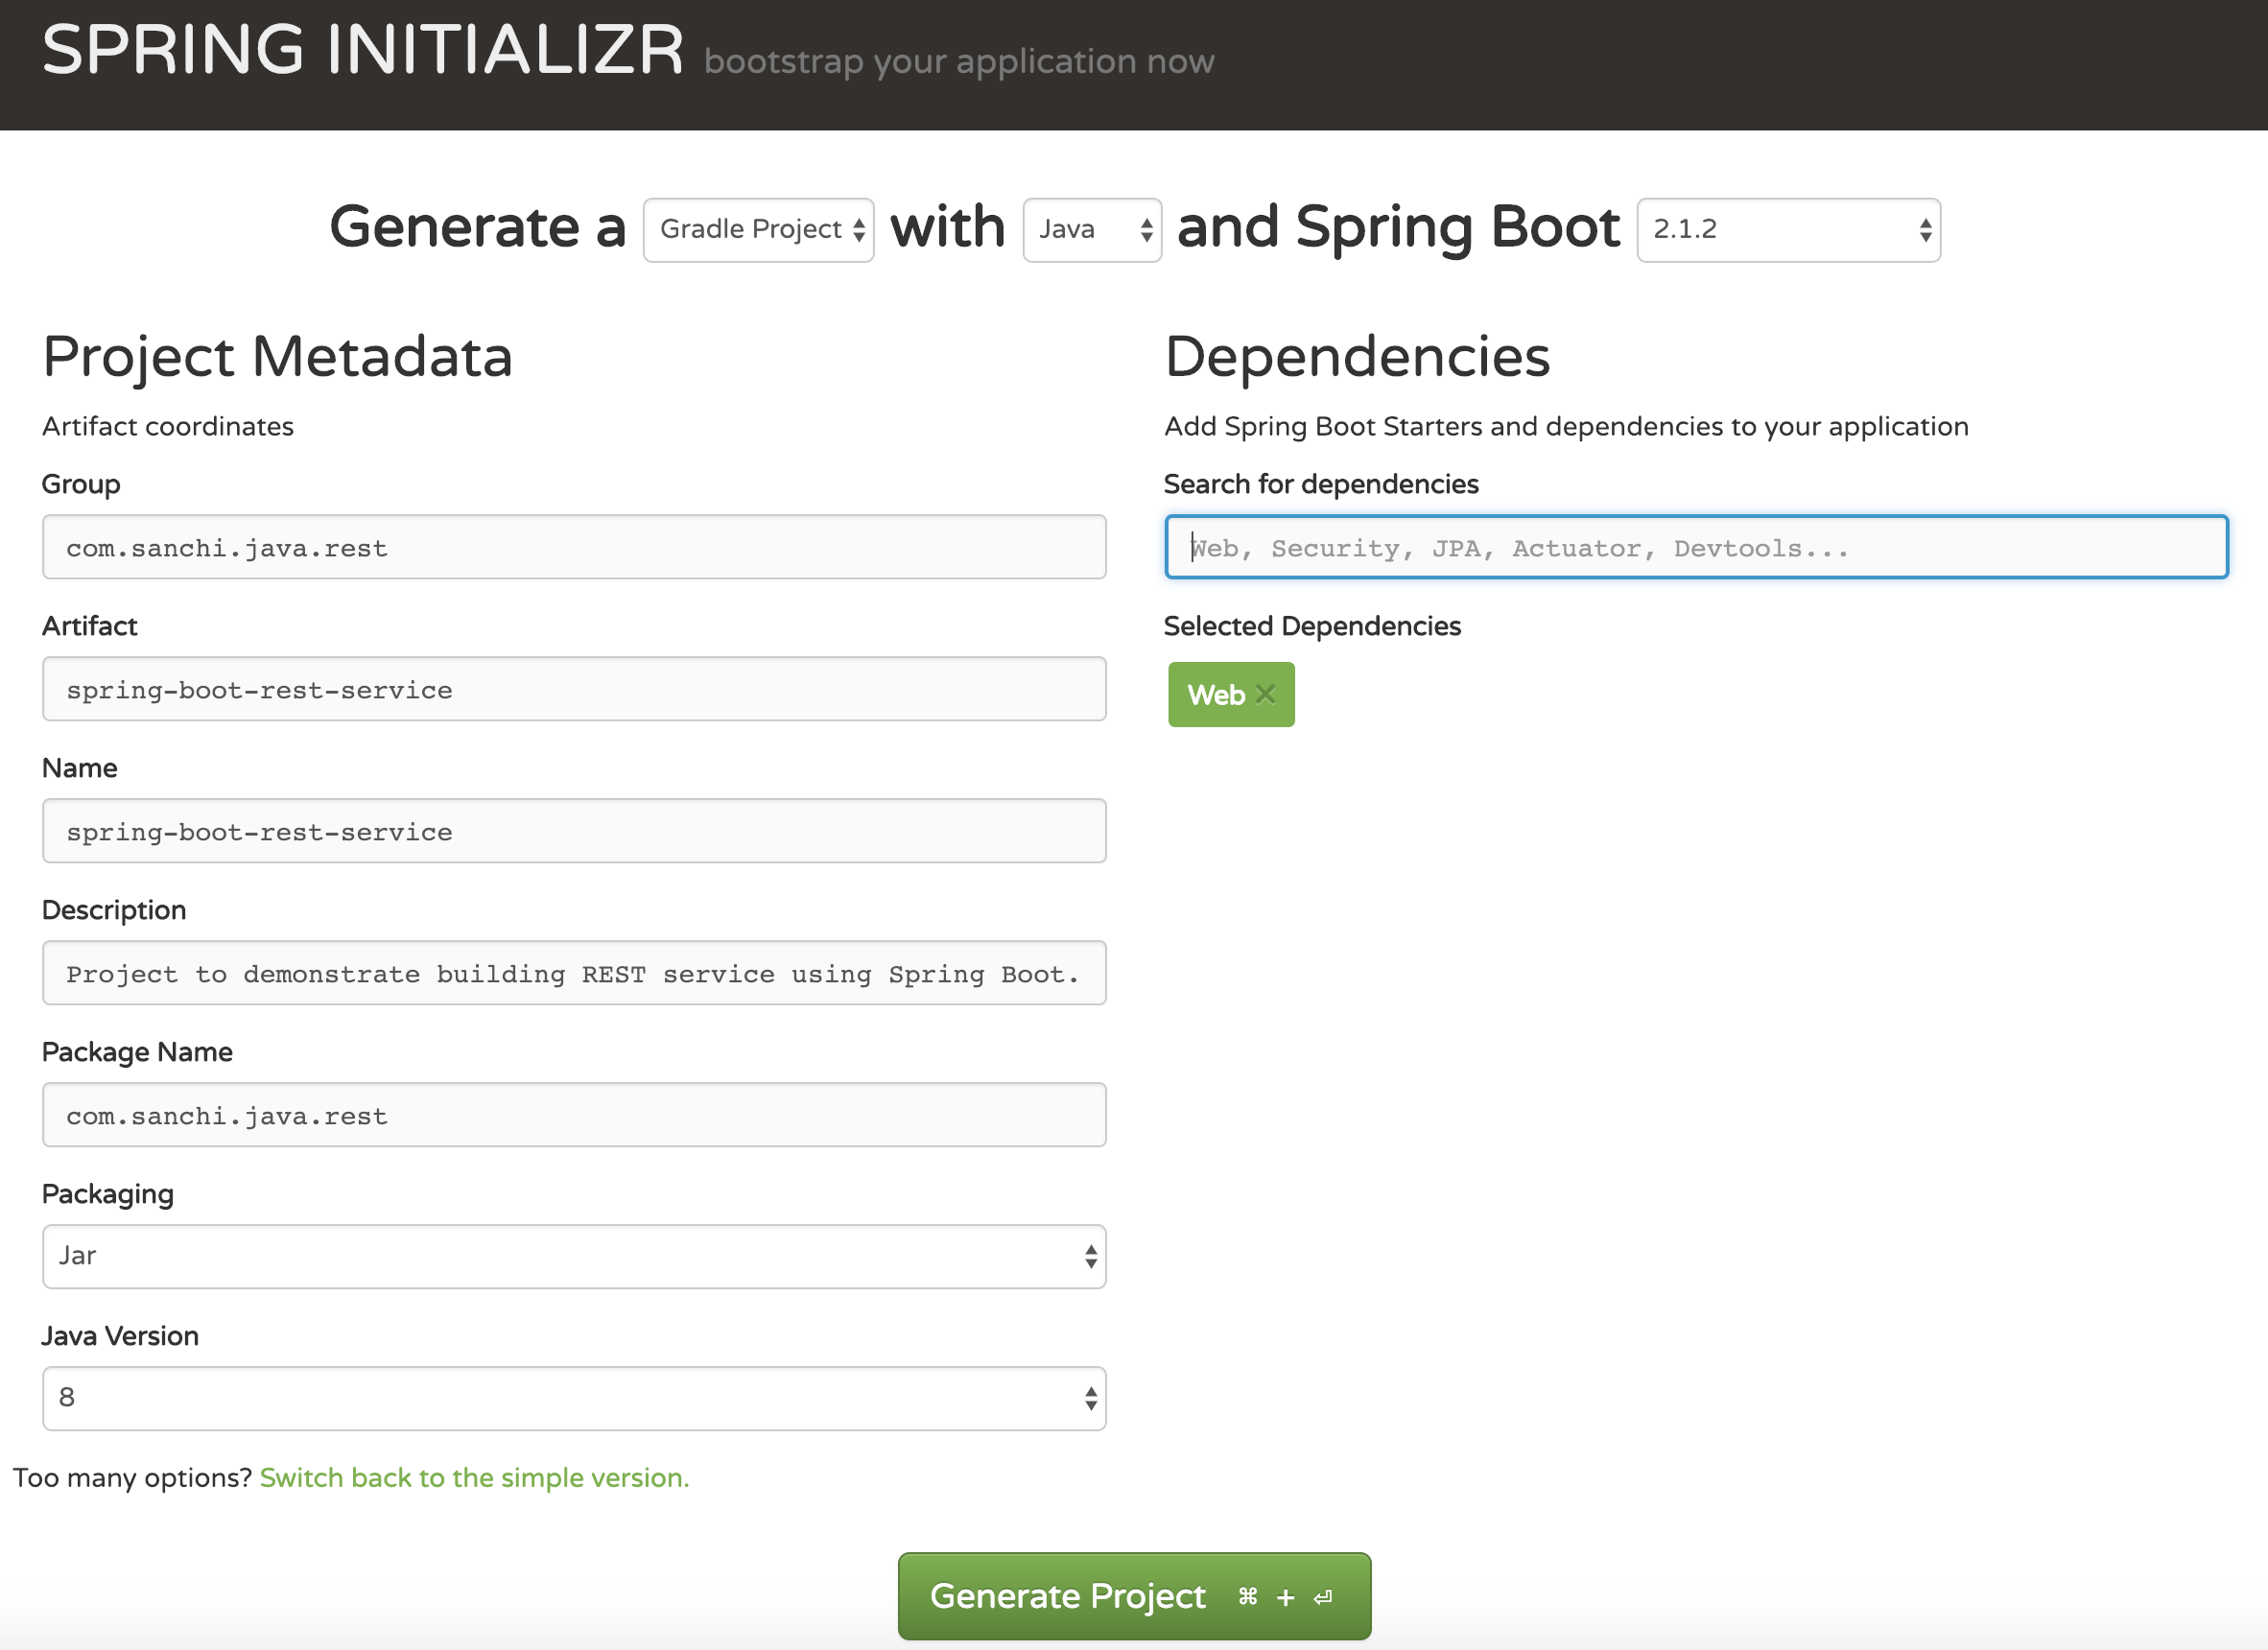
Bootstrapping REST service using Spring Initialzr
The simplest way to bootstrap a REST web service is by using Spring Initializr. Fill the form as shown below and click on Generate Project to download the bootstrap spring boot project.
Project Structure
After the download is complete, unzip and open the project using your IDE. I am using IntelliJ in this article. However, you can use any IDE that you are comfortable with.
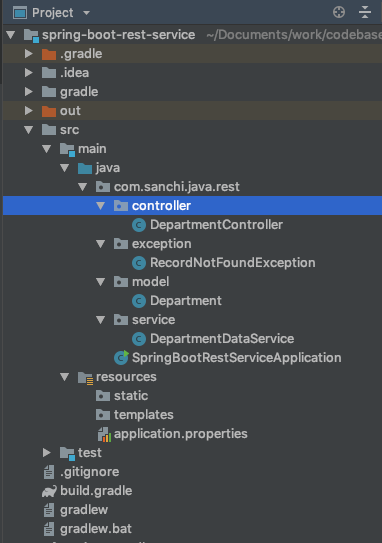
After opening the project using IntelliJ I have created few packages for controller, exception, model and service as shown in the structure above. In this article I will go in detail over the controller section. Other classes are utility classes to mock some data for the service.
Creating Request Mappings
Let’s get our hands dirty and do some coding. In this section we will focus on building the DepartmentController which will have methods to support CRUD operations.
Create
As mentioned above, for a create operation we will be using HTTP POST method. This is a non-idempotent method, which mean that an operation made using HTTP POST should result in a change of state of resource.
@RestController
@RequestMapping("/departments")
public class DepartmentController {

  @Autowired
  DepartmentDataService dataService;

  @RequestMapping(value = "/", method = RequestMethod.POST)
  public ResponseEntity<Department> create(@RequestBody Department department) {
    return ResponseEntity.status(HttpStatus.CREATED).body(dataService.create(department));
  }
}
Now let’s discuss the above code in detail.
- @RestController: It is a spring provided annotation which registers the class as a REST controller in spring context. This is a class level annotation.
- @RequestMapping: This annotation is also provided by spring. This can be used at both class and method level. It is used to define the URI mapping. In this case, I have it on both class
DepartmentControllerand methodcreate. The one on class level defines a common URI mapping for all public methods in the class. However, the one on method level is particular to the method. i.e. in this case the overall URI path for method create will be'/departments' + '/' = '/departments/'. - @RequestBody: This spring annotation is used to map the HTTP POST payload with a POJO class in the application.
- @Autowired: DepartmentDataService is a data mock I have created to mock a database, as we don’t want to get into the complexities of integrating with a database in this article.
Read/Retrieve
In case of read or retrieval operation as suggested above I will be using HTTP GET. Below are two read operations, one that lists all departments and other to get department by Id.
@RestController
@RequestMapping("/departments")
public class DepartmentController {

  @Autowired
  DepartmentDataService dataService;

  // list all departments
  @RequestMapping(value = "/", method = RequestMethod.GET)
  public ResponseEntity<List<Department>> get() {
    List<Department> departments = dataService.get();
    return ResponseEntity.ok(departments);
  }

  // returns a single department
  @RequestMapping(value = "/{department-id}", method = RequestMethod.GET)
  public ResponseEntity<Department> get(@PathVariable("department-id") int id)
      throws RecordNotFoundException {
    return ResponseEntity.ok(dataService.get(id));
  }
}
@PathVariable is used to bind the department id available in the URI path (e.g. ‘/departments/1’) to an argument of the get method.
Update
@RestController
@RequestMapping("/departments")
public class DepartmentController {

  @Autowired
  DepartmentDataService dataService;

  @RequestMapping(value = "/{department-id}", method = RequestMethod.PUT)
  public ResponseEntity<Department> update(@PathVariable("department-id") int id,
      @RequestBody Department department) throws RecordNotFoundException {
    department.setId(id);
    return ResponseEntity.ok(dataService.update(department));
  }
}
Delete
@RestController
@RequestMapping("/departments")
public class DepartmentController {

  @Autowired
  DepartmentDataService dataService;

  @RequestMapping(value = "/{department-id}", method = RequestMethod.DELETE)
  public ResponseEntity delete(@PathVariable("department-id") int id) {
    dataService.delete(id);
    return ResponseEntity.noContent().build();
  }
}
Running the application
One of the biggest advantages of packaging your application as a jar and using an embedded HTTP server is that you can run your application as your would any other. The Spring Boot Gradle plugin also includes a bootRun task that can be used to run your application in an exploded form. The bootRun task is added whenever you apply org.springframework.boot and java plugins.
./gradlew bootRunIn case you have configured your project with maven, you can use the below command to start the application.
mvn spring-boot:runTesting using Postman
Now let’s get to the part where we will validate above code. I’ll be using Postman as a HTTP client to test the application. However, you can decide to use any other client that you are comfortable with. Also you can find JSON file of my Postman project in the same Github repository under the path /src/test/resources/postman.
Create
Request to create a new department
Request
HTTP POST -> http://localhost:8085/library/departments/Request Body
{
  "name": "Others"
}
Response Body
{
    "id": 4,
    "name": "Others"
}
A new department is created with id as 4.
Read/Retrieve
Request all departments
Request
HTTP GET -> http://localhost:8085/library/departments/Response Body
[
    {
        "id": 1,
        "name": "Computer Science"
    },
    {
        "id": 2,
        "name": "Electronics and Communication"
    },
    {
        "id": 3,
        "name": "Mechanical"
    },
    {
        "id": 4,
        "name": "Others"
    }
]
Returns an array of departments.
Request department with Id 1
Request
HTTP GET -> http://localhost:8085/library/departments/1Response Body
{
    "id": 1,
    "name": "Computer Science"
}
Returns a single department.
Update
Request update name for department with Id 4
Request
HTTP PUT -> http://localhost:8085/library/departments/4Request Body
{
	"name": "Electrical"
}
Response Body
{
    "id": 4,
    "name": "Electrical"
}
Delete
Request to delete department with Id 4
Request
HTTP DELETE -> http://localhost:8085/library/departments/4Response Status Code : 204 No Content
Source Code on Github